
Firstly, download Ubuntu Server 16.04 from the Ubuntu website – You’ll need to get this installed yourself, there’s thousands of guides on the internet if you’re struggling.
Once your server is accessible, i’d recommend that you SSH to it, although you could perform this though a console.
Firstly, update the APT repositories to ensure everything’s up to date
apt-get updateAnd update any out of date packages. Review the packages that require updating, and then then type ‘yes’ on your keyboard when prompted if happy.
apt-get upgradeNext, we’ll install some packages that are required for zabbix server
apt-get -y install build-essential mysql-server mysql-client libmysqlclient-dev libcurl4-openssl-dev libxml2-dev libopenipmi-dev libssl-dev libsnmp-dev libssh2-1-devYou’ll be prompted to create a password for the MySQL root user – please make a password and remember it!
These should all install without any errors, if you’re having problems please leave a comment and I’ll try to help
Now we’ll download the Zabbix source and extract it
cd /usr/src
wget http://downloads.sourceforge.net/project/zabbix/ZABBIX%20Latest%20Stable/3.0.3/zabbix-3.0.3.tar.gz
tar xzfv zabbix-3.0.3.tar.gz
Now we start getting to the fun part, actually configuring and compiling Zabbix. I’ve configured it with everything but ssh and jabber, you may remove parts such as –with-openipmi if you’re not wishing to use IPMI monitoring.
cd zabbix-3.0.*
./configure --enable-server --enable-agent --with-mysql --enable-ipv6 --with-net-snmp --with-libcurl --with-libxml2 --with-openipmi --with-openssl --prefix=/usr/local
This should only take a few moments, and you’ll be presented with the final configuration – check over this to ensure it has everything you need and then we can start compiling.
make installThis only took a minute or so on my small virtual machine I tested with, but could be slightly slower or faster depending on the specification of the server.
Now, we’ll make the MySQL accounts that Zabbix will need. Let’s start by getting to the MySQL console
mysql -u root -pThis will prompt for the MySQL root password that we set earlier. Now we’ll run the SQL to create the Zabbix user and database and assign that user privileges to access that database. Please change PASSWORD to your own password, this can be something completely random as you’ll only need it once to configure Zabbix.
create user 'zabbix'@'localhost' identified by 'PASSWORD';
create database zabbix;
grant all privileges on `zabbix`.* to 'zabbix'@'localhost';
flush privileges;
exit;
After each line, you should get returned something like ‘Query OK, 0 rows affected (0.00 sec)’ or ‘Query OK, 1 row affected (0.00 sec)’ printed to the screen.
Now we’ll import the Zabbix schema.
cd database/mysql
mysql -u root -p zabbix < schema.sql
mysql -u root -p zabbix < images.sql
mysql -u root -p zabbix < data.sql
You’ll be prompted to enter the MySQL root password 3 times here. If everything is OK there will be no other messages printed.
Now we’ll configure the MySQL password in the zabbix-server configuration file. Open /usr/local/etc/zabbix_server.conf in your text editor.
At around line 111, you’ll see the line
# DBPassword=remove the # from the front and paste the Zabbix MySQL user password on the end. It should now look like this
DBPassword=PASSWORDSave and quit the file.
Now we’ll add a user for Zabbix to run as. We’ll configure scripts to control the zabbix server daemon.
Create the file /etc/systemd/system/multi-user.target.wants/zabbix-server.service
Paste the following contents into the file and save and quit
[Unit]
Description=Zabbix Server
After=syslog.target network.target mysqld.service

[Service]
Type=oneshot
ExecStart=/usr/local/sbin/zabbix_server -c /usr/local/etc/zabbix_server.conf
ExecReload=/usr/local/sbin/zabbix_server -R config_cache_reload
RemainAfterExit=yes
PIDFile=/var/run/zabbix/zabbix_server.pid

[Install]
WantedBy=multi-user.target
Now we need to add the user on the system for Zabbix to run as
useradd -M zabbixNow we’ll reload systemd and start the zabbix-server service
systemctl daemon-reload
systemctl start zabbix-server.service
That completes the configuration needed for zabbix-server, we’ll move onto the Web interface now.
Firstly, install NGINX, PHP and various PHP modules that we’ll need to run the web interface.
apt-get -y install nginx php php-bcmath php-mbstring php-gd php-xmlwriter php-xmlreader php-mysqliNow we’ll need to make a directory for the files to be served from and copy the front end files to it.
mkdir /usr/local/www
cd ../../frontends/php/
cp -r * /usr/local/www/
chown -R www-data:www-data /usr/local/www/*
Now we’ll configure the web server. Open /etc/nginx/sites-enabled/default in your favorite text editor. Delete all the existing contents and replace them to look like this:
server {
listen 80 default_server;
listen [::]:80 default_server;

root /usr/local/www;

index index.php;

server_name _;

location / {
try_files $uri $uri/ =404;
}

location ~ \.php$ {
include snippets/fastcgi-php.conf;
fastcgi_pass unix:/run/php/php7.0-fpm.sock;
}
}
Now save this file. Next we’ll be changing some options in the PHP config. Open /etc/php/7.0/fpm/php.ini with your text editor.
Around line 368 you will see
max_execution_time = 30This needs to be changed to
max_execution_time = 300Around line 378 you will see
max_input_time = 60This needs to be changed to
max_input_time = 300Around line 656 you will see
post_max_size = 8MThis needs to be changed to
post_max_size = 16MAround line 912 you will see
;date.timezone =This needs to be changed like this
date.timezone = Europe/LondonSee a list of possible timezones here.
Save and exit the file, and restart NGINX and PHP FPM.
Now, go to your server’s address in your web browser, you should see a screen like this
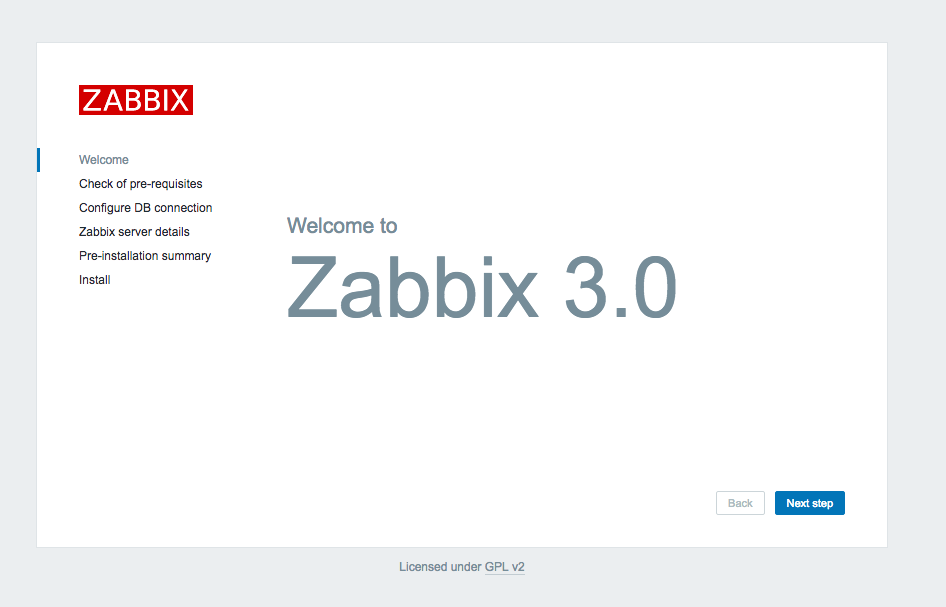
Click the ‘Next Step’ button and you will be presented with a ‘Check of pre-requisites’ page. Scrolling down the list these should all have ‘OK’ next to them.
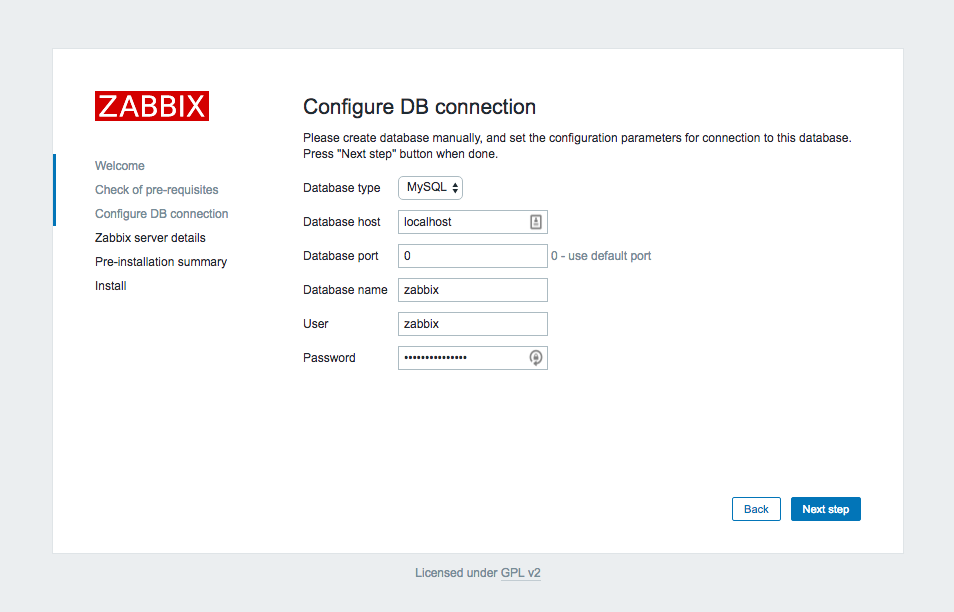
On the next page, you’ll just need to enter the password for the zabbix user in MySQL.
If everything is Ok, the next page will look like this. You can optionally give your server a name.

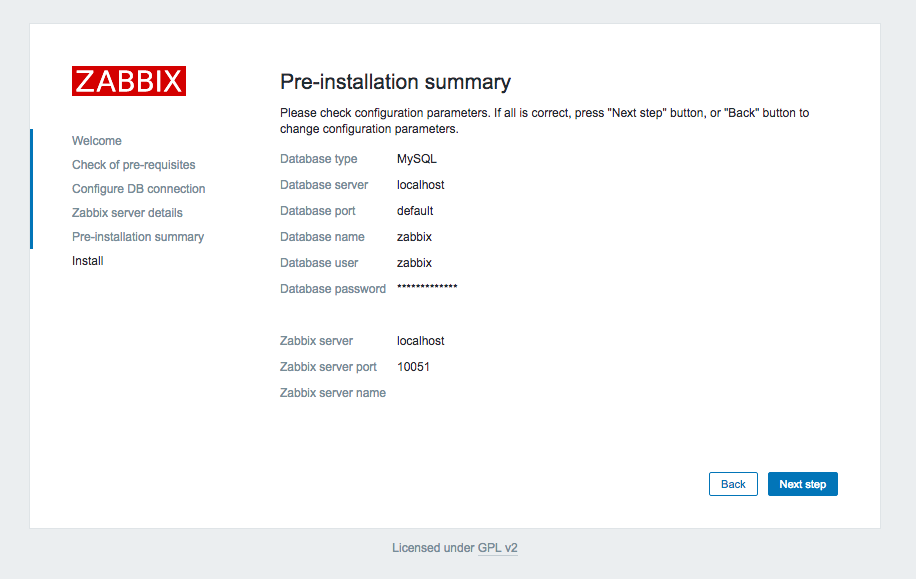
On the next page you’ll be presented with an installation summary like the below
On the next page, you’ll get a ‘Congratulations’ page like this

You’ve now successfully installed Zabbix and it’s web interface! Clicking finish will take you to the login page, the default user is admin and the password is zabbix.
You should see on the dashboard that the Zabbix server is running. This means all is OK – you can now start configuring Zabbix.
If you have any problems or questions, please leave a comment below.
Hi Jordan,
I Can confirm this works also for Zabbix-3.2.3 on Ubuntu 16.04.1 LTS
Install worked a treat.
Much appreciated
static
Couple of format and grammatical issues 😉
The following should be on separate lines
cd database/mysql
mysql -u root -p zabbix < schema.sql
mysql -u root -p zabbix < images.sql
mysql -u root -p zabbix < data.sql
Need to add the user before starting the service.
useradd -M zabbix
systemctl daemon-reload
ystemctl start zabbix-server.service
(Also fix the missing "s" – ystemctl start…)
Hi, Thanks for the feedback – I’ve fixed the issues that you’ve highlighted now
And if you want to make zabbix-agentd a service (to monitor Zabbix server):
sudo nano /etc/systemd/system/multi-user.target.wants/zabbix-agent.service
[Unit]
Description=Zabbix Agent
After=syslog.target network.target mysqld.service
[Service]
Type=oneshot
ExecStart=/usr/local/sbin/zabbix_agentd -c /usr/local/etc/zabbix_agentd.conf
ExecReload=/usr/local/sbin/zabbix_agentd -R config_cache_reload
RemainAfterExit=yes
PIDFile=/var/run/zabbix/zabbix_agent.pid
[Install]
WantedBy=multi-user.target
Then:
sudo systemctl daemon-reload
sudo systemctl start zabbix-agent.service
Test:
zabbix_get -s 127.0.0.1 -k “agent.version”
3.2.4
If you use mariadb and not mysql there is a slight change… you will need the mysql libs to compile so when the line that says…
apt-get -y install build-essential mysql-server mysql-client libmysqlclient-dev libcurl4-openssl-dev libxml2-dev libopenipmi-dev libssl-dev libsnmp-dev libssh2-1-dev
take out these mysql-server mysql-client but leave the libmysqlclient-dev in. Your mileage might vary. I did this on linux Mint 18 which is based on Ubuntu 16.04 and I already had Mariadb-10.0 installed.
Also I had apache running so port 80 was in use…. so the install of nginx will have a few issues….
Setting up nginx-core (1.10.0-0ubuntu0.16.04.4) …
Job for nginx.service failed because the control process exited with error code. See “systemctl status nginx.service” and “journalctl -xe” for details.
invoke-rc.d: initscript nginx, action “start” failed.
● nginx.service – A high performance web server and a reverse proxy server
Loaded: loaded (/lib/systemd/system/nginx.service; enabled; vendor preset: enabled)
Active: failed (Result: exit-code) since Tue 2017-04-11 11:22:41 BST; 15ms ago
Process: 30695 ExecStart=/usr/sbin/nginx -g daemon on; master_process on; (code=exited, status=1/FAILURE)
Process: 30691 ExecStartPre=/usr/sbin/nginx -t -q -g daemon on; master_process on; (code=exited, status=0/SUCCESS)
Apr 11 11:22:39 db-linux nginx[30695]: nginx: [emerg] listen() to [::]:80, backlog 511 failed …use)
Apr 11 11:22:40 db-linux nginx[30695]: nginx: [emerg] listen() to 0.0.0.0:80, backlog 511 fail…use)
Apr 11 11:22:40 db-linux nginx[30695]: nginx: [emerg] listen() to [::]:80, backlog 511 failed …use)
Apr 11 11:22:40 db-linux nginx[30695]: nginx: [emerg] listen() to 0.0.0.0:80, backlog 511 fail…use)
Apr 11 11:22:40 db-linux nginx[30695]: nginx: [emerg] listen() to [::]:80, backlog 511 failed …use)
Apr 11 11:22:41 db-linux nginx[30695]: nginx: [emerg] still could not bind()
Apr 11 11:22:41 db-linux systemd[1]: nginx.service: Control process exited, code=exited status=1
Apr 11 11:22:41 db-linux systemd[1]: Failed to start A high performance web server and a rever…ver.
Apr 11 11:22:41 db-linux systemd[1]: nginx.service: Unit entered failed state.
Apr 11 11:22:41 db-linux systemd[1]: nginx.service: Failed with result ‘exit-code’.
Hint: Some lines were ellipsized, use -l to show in full.
dpkg: error processing package nginx-core (–configure):
subprocess installed post-installation script returned error exit status 1
dpkg: dependency problems prevent configuration of nginx:
nginx depends on nginx-core (>= 1.10.0-0ubuntu0.16.04.4) | nginx-full (>= 1.10.0-0ubuntu0.16.04.4) | nginx-light (>= 1.10.0-0ubuntu0.16.04.4) | nginx-extras (>= 1.10.0-0ubuntu0.16.04.4); however:
Package nginx-core is not configured yet.
Package nginx-full is not installed.
Package nginx-light is not installed.
Package nginx-extras is not installed.
nginx depends on nginx-core (<< 1.10.0-0ubuntu0.16.04.4.1~) | nginx-full (<< 1.10.0-0ubuntu0.16.04.4.1~) | nginx-light (<< 1.10.0-0ubuntu0.16.04.4.1~) | nginx-extras (<< 1.10.0-0ubuntu0.16.04.4.1~); however:
Package nginx-core is not configured yet.
Package nginx-full is not installed.
Package nginx-light is not installed.
Package nginx-extras is not installed.
dpkg: error processing package nginx (–configure):
dependency problems – leaving unconfigured
Errors were encountered while processing:
nginx-core
nginx
E: Sub-process /usr/bin/dpkg returned an error code (1)
To get it to work I amended the nginx configuation file and set it to another port (I used 88). Then I did this (all the php bits had installed fine).
# sudo apt-get remove nginx* && sudo apt-get install nginx-full
Then follow the rest of the document (I needed to amend ports from 80 to 88).
The restarts I ran were:
/etc/init.d/php7.0-fpm restart
/etc/init.d/php7.0-fpm status
service nginx restart
service nginx status
Thanks a lot, everything worked like a charm on my Ubuntu 18.04 LTS (bionic) with Nginx and PHP 7.2.7.
One comment though, it seems the default user after the installation is: “Admin” and not “admin”.
I realize this is an old(er) project, but I just discovered it and wanted to run zabbix to keep an eye on my pfsense server.
Running Ubuntu 18 on my XU4.
root@odroid:/usr/src/zabbix-3.0.3# make install
Making install in src
make[1]: Entering directory ‘/usr/src/zabbix-3.0.3/src’
Making install in libs
make[2]: Entering directory ‘/usr/src/zabbix-3.0.3/src/libs’
Making install in zbxcrypto
make[3]: Entering directory ‘/usr/src/zabbix-3.0.3/src/libs/zbxcrypto’
gcc -DHAVE_CONFIG_H -I. -I../../../include -I/usr/include -g -O2 -MT libzbxcrypto_a-md5.o -MD -MP -MF .deps/libzbxcrypto_a-md5.Tpo -c -o libzbxcrypto_a-md5.o `test -f ‘md5.c’ || echo ‘./’`md5.c
mv -f .deps/libzbxcrypto_a-md5.Tpo .deps/libzbxcrypto_a-md5.Po
gcc -DHAVE_CONFIG_H -I. -I../../../include -I/usr/include -g -O2 -MT libzbxcrypto_a-base64.o -MD -MP -MF .deps/libzbxcrypto_a-base64.Tpo -c -o libzbxcrypto_a-base64.o `test -f ‘base64.c’ || echo ‘./’`base64.c
mv -f .deps/libzbxcrypto_a-base64.Tpo .deps/libzbxcrypto_a-base64.Po
gcc -DHAVE_CONFIG_H -I. -I../../../include -I/usr/include -g -O2 -MT libzbxcrypto_a-tls.o -MD -MP -MF .deps/libzbxcrypto_a-tls.Tpo -c -o libzbxcrypto_a-tls.o `test -f ‘tls.c’ || echo ‘./’`tls.c
tls.c: In function ‘zbx_log_ciphersuites’:
tls.c:1608:34: error: dereferencing pointer to incomplete type ‘SSL_CTX {aka struct ssl_ctx_st}’
num = sk_SSL_CIPHER_num(ciphers->cipher_list);
^~
tls.c: In function ‘zbx_tls_init_child’:
tls.c:3095:3: warning: ‘TLSv1_2_client_method’ is deprecated [-Wdeprecated-declarations]
method = TLSv1_2_client_method();
^~~~~~
In file included from /usr/include/openssl/ct.h:13:0,
from /usr/include/openssl/ssl.h:61,
from tls.c:40:
/usr/include/openssl/ssl.h:1638:1: note: declared here
DEPRECATEDIN_1_1_0(__owur const SSL_METHOD *TLSv1_2_client_method(void)) /* TLSv1.2 */
^
tls.c:3097:3: warning: ‘TLSv1_2_method’ is deprecated [-Wdeprecated-declarations]
method = TLSv1_2_method();
^~~~~~
In file included from /usr/include/openssl/ct.h:13:0,
from /usr/include/openssl/ssl.h:61,
from tls.c:40:
/usr/include/openssl/ssl.h:1636:1: note: declared here
DEPRECATEDIN_1_1_0(__owur const SSL_METHOD *TLSv1_2_method(void)) /* TLSv1.2 */
^
tls.c: In function ‘zbx_tls_get_attr_psk’:
tls.c:5636:41: error: dereferencing pointer to incomplete type ‘SSL_SESSION {aka struct ssl_session_st}’
if (NULL != (attr->psk_identity = sess->psk_identity))
^~
Makefile:457: recipe for target ‘libzbxcrypto_a-tls.o’ failed
make[3]: *** [libzbxcrypto_a-tls.o] Error 1
make[3]: Leaving directory ‘/usr/src/zabbix-3.0.3/src/libs/zbxcrypto’
Makefile:469: recipe for target ‘install-recursive’ failed
make[2]: *** [install-recursive] Error 1
make[2]: Leaving directory ‘/usr/src/zabbix-3.0.3/src/libs’
Makefile:445: recipe for target ‘install-recursive’ failed
make[1]: *** [install-recursive] Error 1
make[1]: Leaving directory ‘/usr/src/zabbix-3.0.3/src’
Makefile:457: recipe for target ‘install-recursive’ failed
make: *** [install-recursive] Error 1